 As it was shown earlier the direct application of exposure to the right method (ETTR) without preliminary scene analysis and evaluation often results in a major underexposure which in turn causes poor details, noise, and artefacts. In order to evaluate the necessary depth of tone correction for such underexposed shots we will use the following natural method we will return the zones containing details of high visibility (those are zones from IV to VI) to target density values. Such a move makes sense because in order for those details to be really visible, they need to be in those zones.
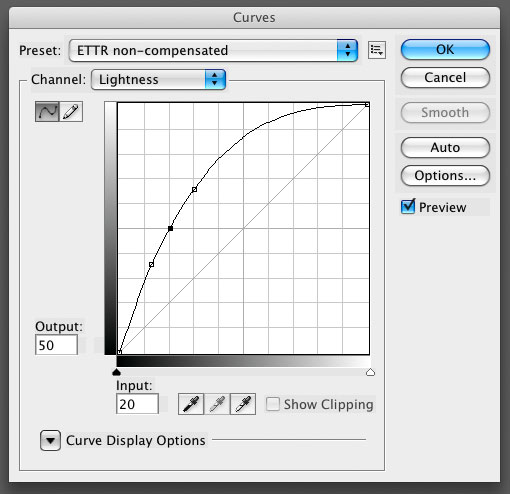
When we are exposing for highlights as we do for ETTR, the mid-tones are necessarily shifted to the shadow values. Because many understand ETTR as defined in the way that the correct exposure is such that the most brightest highlights just touch the right wall of the histogram, we cannot really apply positive exposure correction in the process of conversion. If we will try to, highlights will be clipped, which defeats the purpose of ETTR. That's why we often need to abandon the eV slider and make 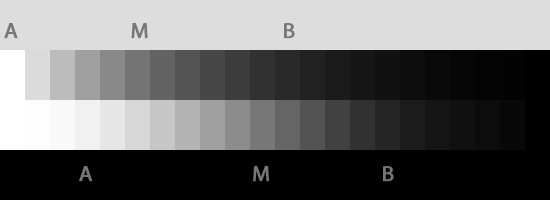 necessary corrections using some sort of curves. Let's see now what are those curves, returning the mid-tones to the values where they belong.
Curves in Lab are best for this purpose, because those curves do not cause any shifts in hues, while those shifts being unavoidable with the majority of controls in widely used converters. In order to make noise and posterization which may be caused by the pretty wild curves we are going to use, we suggest that 16-bit mode in Photoshop is a better option.
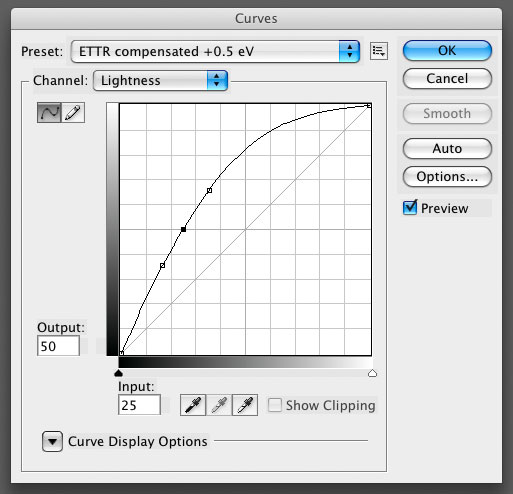 The curves which we will use are based on densitometry, e.g. the points on the curves really do return the mid-tones to the target density values. The curves are not smoothed and if you will decide to use them to process your shots, please check and fine tune the smoothness using a continuous gradient from 0 to 100 on L; on a strip having the width as multiple of 256 the application of a curve should result in a smooth evenly changing gradient. If not, edit the curve slightly. The curves also allow some correction to increase the compression of the highlights in order to improve the contrast and the level of detail visibility in the upper part of Zone VI. However, we suggest that the highlight compression should be done with a separate curve, overlaid on a separate layer over the curves we use here.
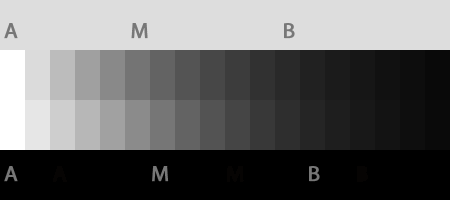
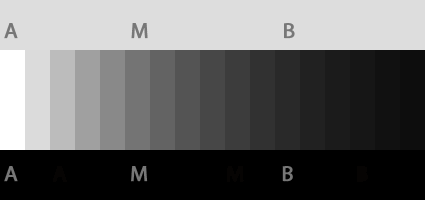
The step wedge we use as a source is the upper one in each pair. The wedge has the step of 0.5 eV between neighbouring patches. The lower wedge is the result of the application of the properly calculated correction curve, which addressed the underexposure of the mid-tones. The patch marked with A is the highlight value. 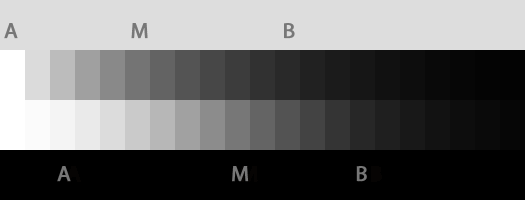 Because the step in these wedges is rather crude, the highlight value often renders to 100%. The patch marked with M is the mid-tone value that is close to 18%. The patch marked with B is the value recommended by Kodak for acceptable black, which can be easily reproduced in a good quality printing process.
All exposure correction values in this article are of the time of shooting, that is they are somehow set on the camera.
The following analysis refers to the scenes where not only highlights but mid-tones 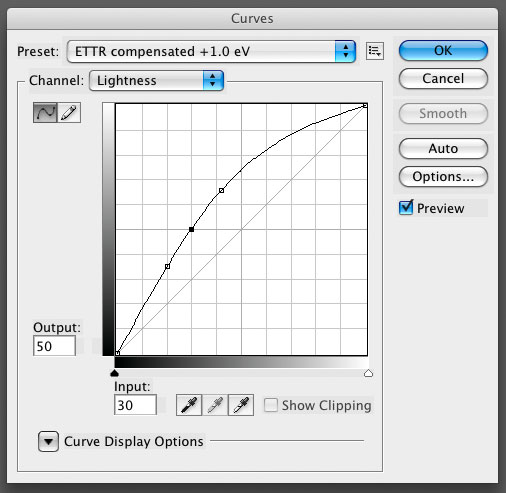 and deep shadows are also present, that is, we do not limit the range of brightnesses in the shadow part of the image, they can go as low as it gets. One other thing to be mentioned is that white balance plays an important role in the total level of underexposure as it was demonstrated. For daylight, the red and blue channels are usually underexposed about 0.5 eV compared to the green channel, the chaanel that will be analyzed further on. For artificial light, the blue channel can be underexposed by 2 to 2.5 eV compared to the green and red channels.
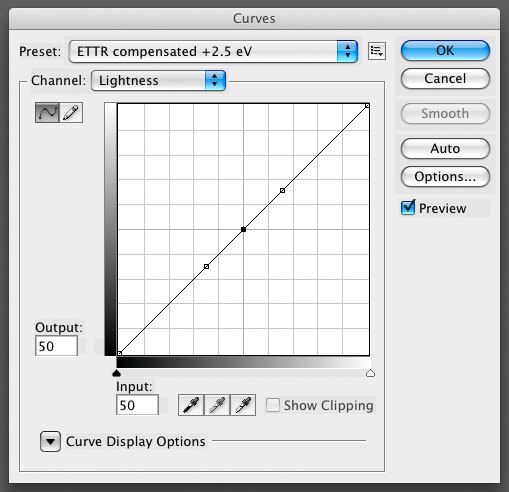
For the scene where sharp highlights and reflections are present, rendering them with non-zero densities - that is without clipping - we are trying to preserve some information in the middle of Zone X, and in this case ETTR results in mid-tone underexposure of 2.5 eV.
As you can see matching the exposed wedge to the wedge resulting from post processing that returns the mid-tones to nominal densities, the mid-tone is excavated 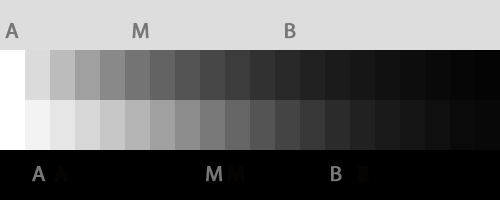 from the very deep shadows. All the rich details which we preserve in highlights during the exposure are now compressed in nearly imperceivable gradations. When it comes to shadows, the correction applied is very strong. For the vast majority of cameras the multiplication of noise results in the noise levels which are unacceptable. You can easily see how violent this correction is, from the shape of the curve.
Getting half a stop down, we find ourselves on the border of zones X and IX. The scene which corresponds to this, is for example a sun-lit web with droplets of water on it. In an attempt to render those droplets in full shape, we will be underexposing the 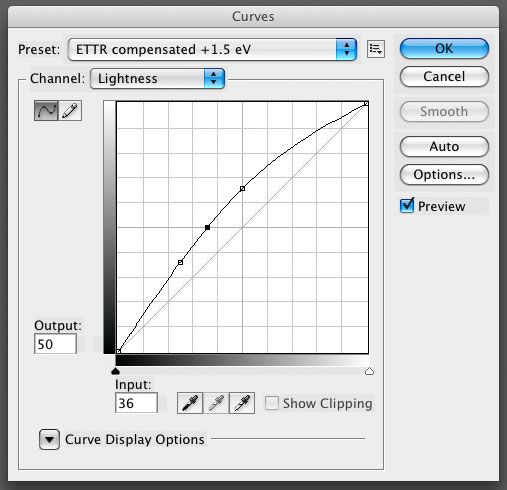 mid-tone by 2 eV. You can compare the wedges before and after correction for mid-tones and see the shape of the curve. The effects here are pretty similar to the previous case.
Dropping by half eV again, we are getting to the middle of the Zone IX. Think new white snow under full light. The underexposure of the mid-tones is about 1.5 eV. For natural light, such scenes should play rather well with ETTR, however it may be wise to take a second shot, increasing exposure by o.5 eV.
Next, is the border between the zones IX and VIII. Some examples are - a waterfall on a clear day, or a backlit portrait with a backdrop having a city scene visible through the window on a nice day. The underexposure here is about 1 eV. Looking at the wedges and curves, we can see that the situation now is not all that dramatic. For such kinds of scenes, one can decide to go with ETTR. That is especially true with the modern cameras, having 14-bit ADC. Of course it's safer to use base ISO sensitivity 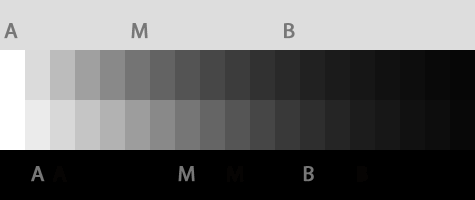 settings and to shoot in daylight.
In the middle of Zone VIII, that is half eV down from the previous, we have a portrait of a fair skinned person with highlights on the cheekbones. That is the mid-tones will be underexposed by half eV.
Finally, we are getting to the border between the zones VIII and VII. The scene having this brightness is, a portrait of a fair skinned person under even light without harsh highlights, or a scene having snow in shadows. If such a scene is exposed to the right, the mid-tones and shadows will be exposed very closes to correct.
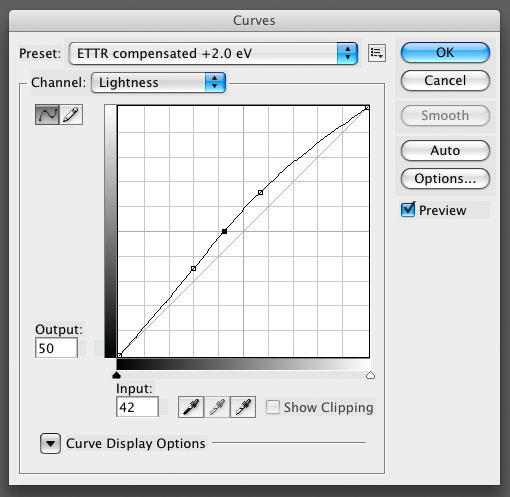 Attached below, you will find the wedges and curves mentioned in this article, in Photoshop format.
In one of the next articles, we will try to demonstrate how one can get from a simplified zone system that drops out the control over the development to a more complete scheme, where the role of controlled development is moved to post processing. In post processing we will emulate what Adams describes as N-1, N, N+1. However, we will do this using much finer gradation that 1 eV, because digital processing allows for much better tolerance compared to wet lab. It also allows for much better repeatability. This emulation will be based on the curves similar to those, which we used in this article.
| Attachment | Size |
|---|---|
| 2.78 KB | |
| 258.82 KB |

Recent comments